Getting an aluminum fence up properly means thinking through the whole process before you pick up a single tool. I’ve seen too many installations go sideways because someone skipped the planning phase or rushed through post setting. The work itself isn’t complicated, but the sequence matters, and so do the details that keep your fence standing straight for decades rather than years.
Local Regulations and Property Boundaries Come First
Before you dig a single hole, you need to sort out the paperwork and property lines. This isn’t the exciting part of aluminum fence installation, but skipping it creates problems that cost far more to fix than prevent.
Most municipalities require permits for fence installations. Height restrictions, setback requirements, and placement rules vary considerably between jurisdictions. Your local planning department can tell you exactly what applies to your property. Some areas have specific rules about fence styles in front yards versus backyards, or near sidewalks and driveways.
Property line accuracy matters more than people realize. A fence placed even a few inches onto a neighbor’s property can trigger disputes or force you to tear it down and start over. If your boundary markers aren’t clearly visible, getting a professional survey done before installation saves potential headaches. The cost of a survey is nothing compared to relocating an entire fence.
Site preparation involves clearing everything along your planned fence line. Vegetation, rocks, old fence remnants, buried debris—all of it needs to go. Uneven ground along the fence path should be addressed now, since leveling becomes much harder once posts are set. Measure your total linear footage carefully, accounting for gates and any elevation changes. This determines how much material you’ll need and helps avoid mid-project supply runs.
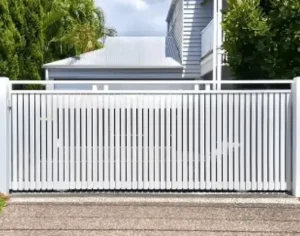
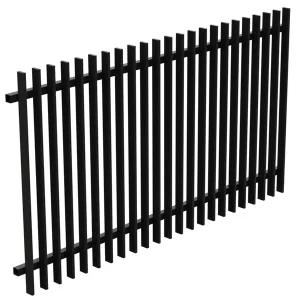
Fence style selection should balance what you want the fence to look like with what you need it to do. Picket spacing affects both privacy and airflow. Height determines security level and visual impact. Color choices range from classic black to bronze, white, and various custom options. Hubei Yulong manufactures designs suited for residential, commercial, and municipal settings, so matching style to application is straightforward.
Setting Posts That Actually Stay Put
Post installation determines whether your aluminum fence stands solid for twenty years or starts leaning within five. This is where shortcuts cause the most damage, and where doing things right pays off longest.
Start by marking exact post locations. String lines stretched between stakes establish your fence line and make it obvious if anything drifts out of alignment. Standard post spacing for aluminum fence panels runs either six or eight feet, depending on your panel system. Consistency here keeps panels fitting properly along the entire run.
Post holes need adequate depth and width for stability. For most residential aluminum fences, dig holes 24 to 30 inches deep and 8 to 10 inches in diameter. Soil conditions affect this—sandy or loose soil may require deeper holes, while dense clay provides more grip at shallower depths.
Concrete provides the most reliable anchor for fence posts. Mix it to a workable consistency following the manufacturer’s directions. Drop a few inches of gravel into each hole bottom first; this creates drainage that prevents water from pooling around the post base and potentially causing frost heave in cold climates.
Center the aluminum post in the hole and check it with a level before pouring. Plumb matters here—a post that’s even slightly off vertical will make panel attachment frustrating and leave visible alignment problems. Pour concrete around the post, filling to just below ground level. Slope the concrete surface away from the post so water sheds rather than pooling.
Wait for full cure before attaching panels. This typically takes 24 to 48 hours, though conditions affect timing. Rushing this step risks post movement that throws off your entire fence alignment. Once cured, post caps add both a finished appearance and protection for the post top.
What Tools Do I Need for Aluminum Fence Installation?
Aluminum fence installation requires specific tools for accurate, efficient work. You’ll need a post-hole digger (manual works for small projects, powered saves significant effort on longer runs), a four-foot level, tape measure, and string line for layout. A rubber mallet helps seat panels without damaging the finish. A drill with appropriate bits handles fastener installation. Safety glasses are essential, especially when cutting.
For cutting aluminum fence panels or posts to length, a miter saw with a non-ferrous blade produces clean cuts without the burring that standard blades cause. These tools together enable precise measurements, level placement, and secure connections throughout the project.
Connecting Panels for a Clean, Solid Run
Panel attachment transforms individual posts into an actual fence. This phase moves faster than post setting, but attention to alignment keeps the finished result looking professional rather than improvised.
With posts cured and solid, slide panel brackets onto the posts at the correct heights. Position your first panel between two posts and check level before securing anything. The panel should sit where you want it with brackets supporting it properly. Then drive fasteners through brackets into posts.
Each subsequent panel needs to align with the previous one. Checking level frequently catches drift before it accumulates into a visible problem. Top rail height should stay consistent across the entire fence run. Small adjustments at each panel prevent larger corrections later.
Cutting panels to fit specific lengths or angles requires the right blade and technique. A non-ferrous miter saw blade cuts aluminum cleanly without grabbing or leaving rough edges. Measure twice, obviously. Safety gear isn’t optional when cutting—aluminum chips are sharp and travel fast.
Leveling across sections creates the professional appearance that distinguishes careful installation from rushed work. Bracket adjustments or shims can compensate for minor post height variations. The goal is a uniform line that looks intentional rather than approximate.
Can I Install an Aluminum Fence on a Sloped Yard?
Sloped terrain requires either rackable panels or a stair-stepping approach. Rackable fence panels are engineered to pivot at the rail connections, allowing them to follow ground contours while maintaining consistent picket orientation. This eliminates gaps beneath the fence that would otherwise appear on slopes.
Stair-stepping uses standard panels installed at different heights, creating a stepped appearance where each section drops to match the terrain. This method requires planning to keep step intervals consistent and visually balanced. Both approaches work well; the choice depends on slope severity and aesthetic preference.
Gates Need Extra Attention to Work Right
Gate installation demands more precision than panel runs because gates are moving parts. A gate that binds, sags, or won’t latch properly defeats its purpose and creates daily frustration.
Gate posts carry more stress than line posts, so their anchoring matters even more. Verify they’re plumb and fully cured before proceeding. Attach hinges to the gate frame first, then to the gate post, following the manufacturer’s sequence. Hinge placement affects how the gate swings and whether it clears the ground properly.
Self-closing hinges require tension adjustment. Too much tension and the gate slams; too little and it won’t close reliably. Finding the right setting takes some trial and error. Test the gate through multiple open-close cycles to confirm consistent behavior.
Latch installation requires alignment between the latch mechanism and strike plate. Position the latch at a comfortable operating height. The latch should engage smoothly without forcing and lock securely. Misalignment here causes latches that stick, miss, or fail to secure.
Double gates need both leaves to meet correctly when closed. Adjust hinges to eliminate gaps between the gates and prevent sagging that causes them to drag or bind. A drop rod or cane bolt on one leaf keeps it stationary while the active leaf operates normally.
Keeping Your Fence Looking Good for Years
Aluminum fencing requires less maintenance than wood or steel, but some attention extends its life and appearance. The powder-coated finish on quality aluminum fencing resists corrosion and weathering, though it benefits from occasional care.
Cleaning is the main maintenance task. Mild soap and water with a soft brush removes accumulated dirt, pollen, and environmental deposits. Avoid abrasive cleaners or harsh chemicals that can damage the protective coating. Rinse thoroughly after washing. Most homeowners find that cleaning once or twice a year keeps their fence looking fresh.
Periodic inspection catches small issues before they become larger problems. Check fasteners for tightness, hinges for smooth operation, and latches for proper engagement. Tighten anything that’s loosened. Lubricate hinges if they start binding.
Minor finish damage—scratches or chips from impacts—should be touched up with matching paint. While aluminum itself doesn’t rust, exposed areas can oxidize over time. Touch-up paint, available from most fence manufacturers, seals these spots and maintains the uniform appearance.
YLOONG Solutions: Engineered for Security, Designed for Performance
Common Questions About Aluminum Fence Installation
What is the average cost to install an aluminum fence per linear foot?
Aluminum fence installation typically runs between $25 and $50 per linear foot including materials and professional labor. The range reflects variations in fence height, style complexity, gate requirements, and regional labor rates. DIY installation reduces costs significantly, though material quality remains the primary factor in long-term value. Higher-grade aluminum and better powder coating, like Hubei Yulong products offer, cost more initially but require less maintenance and last longer.
How long does it take to install a typical aluminum fence?
A residential aluminum fence project covering 150 to 200 linear feet generally takes one to three days for experienced installers or capable DIYers. Terrain complications, multiple gates, and difficult digging conditions extend the timeline. Rocky soil or heavy clay slows post hole excavation considerably. Proper planning and having all materials on site before starting keeps the project moving efficiently.
Why choose aluminum over other fence materials for my property?
Aluminum fencing combines durability with low maintenance in ways other materials can’t match. It won’t rot or warp like wood, and it won’t rust like steel. The powder-coated finish resists fading and requires only occasional cleaning. Aluminum’s lighter weight makes installation easier than comparable steel fencing. For applications ranging from residential boundaries to commercial security, aluminum delivers reliable performance across decades of service with minimal upkeep requirements.
Get Started With Quality Aluminum Fencing
Ready to improve your property’s security and appearance with aluminum fencing? Hubei Yulong Environmental Protection Building Materials Technology Co., Ltd. manufactures durable, high-performance aluminum and zinc steel fencing systems for municipal, residential, and commercial applications. Reach out at +8619072006155 or sales01@yulongkeji-ch.com to discuss your project requirements and learn how corrosion-resistant, professionally engineered fencing can serve your property for years to come.